Using Docker Compose to Set Up a Distributed MinIO Cluster for Testing
MinIO is an open-source object storage server that is designed to be simple, scalable, and fast. It is compatible with the Amazon S3 API, making it easy to use with a wide range of tools and applications.
Distributed MinIO is a mode of operation in which multiple MinIO instances are combined to form a single, logical object storage server. This can be useful for improving performance and reliability, as the workload can be distributed across multiple instances and data can be stored redundantly across multiple disks or servers.
By default, a single MinIO instance can handle a certain amount of throughput and storage capacity. In a distributed setup, the capacity and performance can be increased by adding more instances. This can be useful for applications that require high levels of throughput, such as video streaming or data analytics.
In addition to increasing capacity and performance, distributed MinIO can also improve reliability by storing data redundantly across multiple instances. This means that if one instance fails, the data will still be available from the other instances in the cluster. This can be especially useful for applications that require high availability, such as online e-commerce platforms.
Overall, distributed MinIO can be a useful tool for applications that need to scale and handle large amounts of data with high levels of performance and reliability.
setting up a distributed MinIO cluster for testing using docker-compose

Create a new directory for the project: Next, create a new directory where you want to store the project files. This will be the root directory for your distributed MinIO cluster.
Create a docker-compose.yml file: In the root directory, create a file named docker-compose.yml. This file will define the configuration for the distributed MinIO cluster.
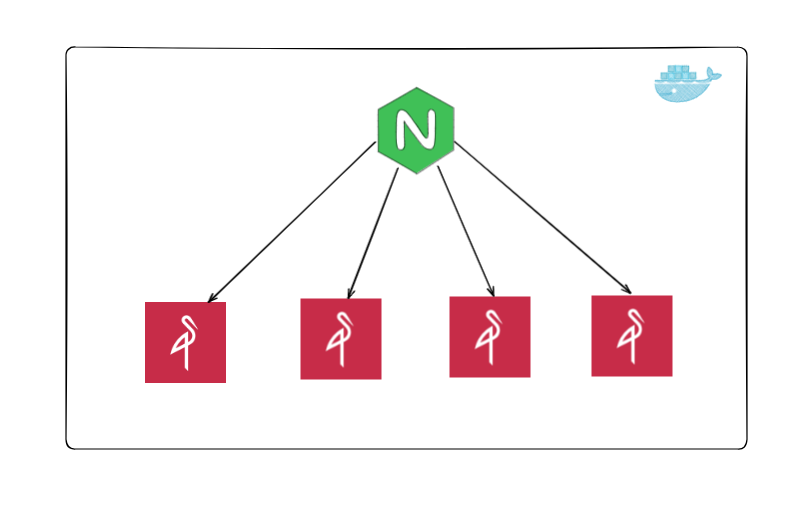
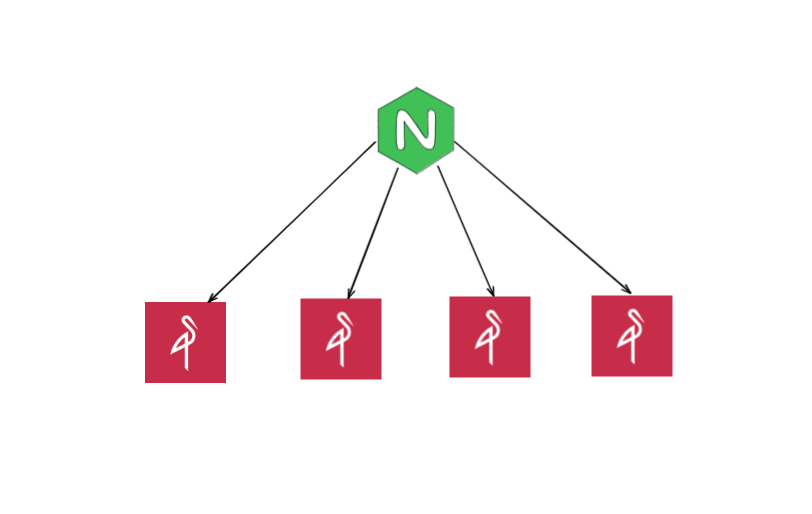
Define the MinIO instances in the docker-compose.yml file: In the docker-compose.yml file, define a new service for each MinIO instance that you want to include in the cluster and a load balancer to acces the service from a single entrypoint. Here is an example configuration that creates four MinIO instances as a distributed cluster and an nginx load balancer to access the cluster :
version: '3.7'

# configuration source https://github.com/minio/minio/blob/master/docs/orchestration/docker-compose/docker-compose.yaml

# Settings and configurations that are common for all containers
x-minio-common: &minio-common
  image: quay.io/minio/minio:RELEASE.2022-12-12T19-27-27Z
  command: server --console-address ":9001" http://minio{1...4}/data{1...2}
  expose:
    - "9000"
    - "9001"
  # environment:
    # MINIO_ROOT_USER: 'your-access-key'
    # MINIO_ROOT_PASSWORD: 'your-secret-key'
  healthcheck:
    test: ["CMD", "curl", "-f", "http://localhost:9000/minio/health/live"]
    interval: 30s
    timeout: 20s
    retries: 3

# starts 4 docker containers running minio server instances.
# using nginx reverse proxy, load balancing, you can access
# it through port 9000.
services:
  minio1:
    <<: *minio-common
    hostname: minio1
    volumes:
      - data1-1:/data1
      - data1-2:/data2

  minio2:
    <<: *minio-common
    hostname: minio2
    volumes:
      - data2-1:/data1
      - data2-2:/data2

  minio3:
    <<: *minio-common
    hostname: minio3
    volumes:
      - data3-1:/data1
      - data3-2:/data2

  minio4:
    <<: *minio-common
    hostname: minio4
    volumes:
      - data4-1:/data1
      - data4-2:/data2

  nginx:
    image: nginx:1.19.2-alpine
    hostname: nginx
    volumes:
      - ./nginx.conf:/etc/nginx/nginx.conf:ro
    ports:
      - "9000:9000"
      - "9001:9001"
    depends_on:
      - minio1
      - minio2
      - minio3
      - minio4

## By default this config uses default local driver,
## For custom volumes replace with volume driver configuration.
volumes:
  data1-1:
  data1-2:
  data2-1:
  data2-2:
  data3-1:
  data3-2:
  data4-1:
  data4-2:
create a file named nginx.conf. This file will define the configuration of the nginx load balancer used to distribute the load for the distributed MinIO cluster.
# configuration source https://github.com/minio/minio/blob/master/docs/orchestration/docker-compose/nginx.conf

user  nginx;
worker_processes  auto;

error_log  /var/log/nginx/error.log warn;
pid        /var/run/nginx.pid;

events {
    worker_connections  4096;
}

http {
    include       /etc/nginx/mime.types;
    default_type  application/octet-stream;

    log_format  main  '$remote_addr - $remote_user [$time_local] "$request" '
                      '$status $body_bytes_sent "$http_referer" '
                      '"$http_user_agent" "$http_x_forwarded_for"';

    access_log  /var/log/nginx/access.log  main;
    sendfile        on;
    keepalive_timeout  65;

    # include /etc/nginx/conf.d/*.conf;

    upstream minio {
        server minio1:9000;
        server minio2:9000;
        server minio3:9000;
        server minio4:9000;
    }

    upstream console {
        ip_hash;
        server minio1:9001;
        server minio2:9001;
        server minio3:9001;
        server minio4:9001;
    }

    server {
        listen       9000;
        listen  [::]:9000;
        server_name  localhost;

        # To allow special characters in headers
        ignore_invalid_headers off;
        # Allow any size file to be uploaded.
        # Set to a value such as 1000m; to restrict file size to a specific value
        client_max_body_size 0;
        # To disable buffering
        proxy_buffering off;
        proxy_request_buffering off;

        location / {
            proxy_set_header Host $http_host;
            proxy_set_header X-Real-IP $remote_addr;
            proxy_set_header X-Forwarded-For $proxy_add_x_forwarded_for;
            proxy_set_header X-Forwarded-Proto $scheme;

            proxy_connect_timeout 300;
            # Default is HTTP/1, keepalive is only enabled in HTTP/1.1
            proxy_http_version 1.1;
            proxy_set_header Connection "";
            chunked_transfer_encoding off;

            proxy_pass http://minio;
        }
    }

    server {
        listen       9001;
        listen  [::]:9001;
        server_name  localhost;

        # To allow special characters in headers
        ignore_invalid_headers off;
        # Allow any size file to be uploaded.
        # Set to a value such as 1000m; to restrict file size to a specific value
        client_max_body_size 0;
        # To disable buffering
        proxy_buffering off;
        proxy_request_buffering off;

        location / {
            proxy_set_header Host $http_host;
            proxy_set_header X-Real-IP $remote_addr;
            proxy_set_header X-Forwarded-For $proxy_add_x_forwarded_for;
            proxy_set_header X-Forwarded-Proto $scheme;
            proxy_set_header X-NginX-Proxy true;

            # This is necessary to pass the correct IP to be hashed
            real_ip_header X-Real-IP;

            proxy_connect_timeout 300;

            # To support websocket
            proxy_http_version 1.1;
            proxy_set_header Upgrade $http_upgrade;
            proxy_set_header Connection "upgrade";

            chunked_transfer_encoding off;

            proxy_pass http://console;
        }
    }
}
Start the distributed MinIO cluster: To start the distributed MinIO cluster, navigate to the root directory of the project and run the following command:
docker-compose up -dThis will start the MinIO instances in detached mode, meaning they will run in the background. You can use the following command to view the logs for the MinIO instances:
docker-compose logs -fThis will download the Minio Docker image and start the Minio server. You can access the Minio web UI by going to http://localhost:9001 iin your web browser this
You can verify the the health of the distributed MinIO cluste by going to http://localhost:9001/tools/metrics

To simulate a node failure in a distributed MinIO cluster, you can stop one of the MinIO containers that is running as part of the cluster. Here is one way to do this using docker-compose:
docker-compose ps
This will show the names of the containers, such as "minio1", "minio2" ...
docker-compose stop minio1verify the health of the distributed MinIO cluster by going to http://localhost:9001/tools/metrics

Useful resource and tools for a production deployment:

kubernetes Deployment: https://min.io/docs/minio/kubernetes/upstream/operations/installation.html
Baremetal Deployment Using ansible: https://docs.debops.org/en/v3.0.0/ansible/roles/minio/index.html
Monitoring and Logging: https://min.io/docs/minio/linux/operations/monitoring.html
Load Balancing: https://nginx.org/en/docs/http/load_balancing.html
Conclusion
Overall, using docker-compose to set up a distributed MinIO cluster can be a convenient and efficient way to test applications that rely on object storage. It allows you to easily scale and customize the cluster to meet the needs of your application, and provides a high level of performance and reliability.


